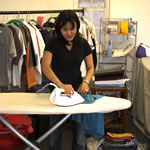
A well-ironed shirt makes the difference between looking slap-dash and looking smart and confident. Over the many years we’ve been laundering clothes in Reading, we’ve spoken to many customers who really hate ironing shirts because they find it really tricky and they struggle to get a good result. There’s a lot that goes into getting a shirt perfectly ironed and the results speak for themselves.
If you iron a shirt well, it will look so much better than a poorly ironed one. Even if you don’t know how to iron a shirt well, or know what goes into it, you can spot a good iron over a bad one.
It takes time and expertise to iron a shirt well. May simply opt for a local ironing service like ours to get the perfect shirt, but some(maybe you) will try to do this at home instead.
Looking for great results with your ironing? Here’s how you do it…
Training is essential
Although you’ll find lots of content online that will show you how to iron and explain what to do, there’s no substitute for training and learning your craft.
At The Ironing Lady, our team all undergo proper training to become a master ironer!
First they undergo several weeks training until they reach the standards developed by The Guild of Launderers and Cleaners! People can’t even get on the course unless they’re a member (it’s very exclusive).
Although the training is fabulous, some simply won’t pass the course. It sounds crazy, but it’s true. If our probationary staff don’t reach the standard, they don’t get the job! It’s the perfect way to make sure we only hire quality team members.
Not a member of guild? Here are some tips to help you at home.
The order to ironing a shirt
A shirt has many different areas to it and it’s best if you methodically work through the shirt in a sensible order.
Here’s what we would suggest:
Prep first
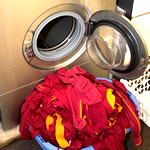
Undo all the buttons on the shirt, including the cuffs. Pour water into your iron and set the temperature, which you’ll know by looking at your shirt’s label. Make sure your iron doesn’t have any rust on it, which could transfer onto your freshly washed shirt.
1. Iron the collar first – the collar frames the face and a perfect collar will fold down better and hold and cover the tie well, too.
2. Then iron the cuffs – the cuffs can often be on show so getting these completely crease-free is really important. Make sure you iron AROUND the buttons – not over them.
3. Iron the shirt’s front – The two large areas on the front will need the creases removing next and it’s a great place to work on after the collars and cuffs.
4. Then do the back of the shirt – once you’re done up front, head to the back and iron away.
5. Now you can iron the sleeves. The key to a well-pressed sleeve is carefully ensuring that entire sleeve is laid flat before you start.
6. Now you can do the Yoke. Not heard of the yoke?It’s the bit of fabric that’s on the back of your shirt, by the shoulders. Slip one of the shirt’s armholes over the narrow end of your ironing board. Press the yoke flat with your hands, and then iron it flat.
7. Then inspect the shirt and hang it on a good hanger, preferably with shoulder protectors to keep the shape.
When you’re done, let the shirt hang for a few minutes to fully cool down.
Working methodically ensures you miss nothing and stops you skipping parts or cutting corners.
Make sure you hang it well to secure all your hard work. You don’t want to leave it on a chair for a child or pet to sit on after you’ve gone to all that effort.
What’s in an iron?
Looking to iron like us and other pros?
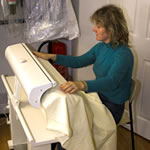
To achieve the finish we get, we recommend you use the best professional hand finishing equipment on the market!
We opt for the Stirovap Boiler Model 223 with the Ironmaster Steam Iron Mk II used with a heated vacuum ironing table to get great results.
But you won’t find it on Amazon. This equipment costs £1655.00 each!
Oh… and you will have to go on a course to learn how to use it.
Steam, the right amount of heat, and a good iron and board are the key to great results in ironing. You really do need good equipment to get the best out of your shirt.
Maintenance during your ironing session
When you’re using the iron, watch out for any buttons that need replacing. This doesn’t mean they’re actually missing; it means spotting when it’s time to replace them. A shirt that loses a button during wear is annoying and pretty useless to the owner.
No matter how beautifully ironed, a shirt with a button missing is unwearable, so prevention is better than cure.
And finally…
After a final quality check, the shirt can then be placed on to a hanger with a shoulder guard or folded onto a shirt board.
You’re advised to encase it in a polythene cover if you can.
There’s a lot of experience, time, and money that goes into ironing a shirt. The best tip we can give you is to get someone to iron them for you.
Not only are we highly qualified and trained, we have the professional equipment and the time to do it too.
We have the staff, expertise, and equipment to press your shirts to the highest standard right here in Reading, for the ridiculously low price of £1.50 hung or £1.75 folded!
No one ever regretted paying for first class service.
Want the perfect shirt? Contact us now. We cover most of the Reading area.